


Alan
Read more
Sloan Flushmate Tanks and Repair Parts for Exgeris Toilets
Weak or Sluggish Flush
A weak or sluggish flush can be caused by worn or defective parts, inadequate water pressure, an improperly adjusted Flush Valve Cartridge, a clogged inlet screen, or insufficient air draw. To diagnose the problem with your toilet, follow these steps:
1. Check the Flushmate Vessel for Leaks
Flushmate toilets use the pressure of the incoming water to pressurize air inside the vessel. When the toilet is flushed the pressurized air forces the water out of the vessel and into the toilet bowl to create the powerful flush which Flushmate is known for. The first step in troubleshooting your system is to make sure there aren’t any leaks in the vessel.
A. Check your Flushmate vessel for obviously visible leaks.
If you have any leaks, cracks, or holes in your vessel, you will need a new Replacement Flushmate Tank
B. Look for excessive water in the porcelain toilet tank.
There may be up to an inch of water in the porcelain tank. If you have more than one inch of water in your tank there is excessive leaking from your Flushmate vessel. You should replace your entire Flushmate system with a new Replacement Flushmate Tank
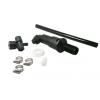
2. Check the Flush Cartridge
There is a handle linkage rod which presses against the flush cartridge actuator. There must be a small gap between this rod and the cartridge actuator for the Flushmate system to function properly. (One way to test this is to bypass the linkage rod and manually press the cartridge. If the toilet flushes properly you will simply need to adjust your cartridge actuator.)
A. Check the gap between the Actuator(A) and the Linkage Rod(B).

- There should be a gap (about the thickness of a penny) between the rod and actuator when gently lifting the rod.
- If the gap is too big, the cartridge will not be fully activated when the handle is pressed.
- If there is not a gap, the cartridge will be held down slightly and will not be able to return to the fully closed position.
B. Adjust the gap (if necessary)
- Start by loosening the setscrew in the center of the Actuator (A).
- Adjust the height of the actuator by turning it clock-wise to lower and counter clock-wise to raise.
- Once adjusted, tighten the setscrew in the center of the actuator.
C. Check cartridge
- Add water and look for bubbles
- Remove and inspect for obvious signs of wear or damage
-
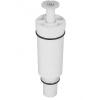
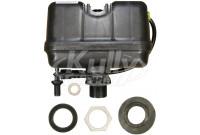
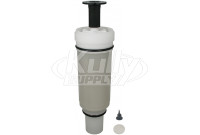
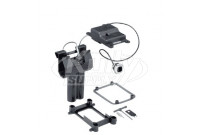
Flushmate 503 Replacement Tank Kit
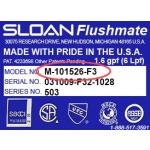
Model #: M-101526-F31 Item #: 129661Learn More- 1.6 GPF (Gallons Per Flush)
- Fits Most 503 Two-Piece Toilets
$194.78 -
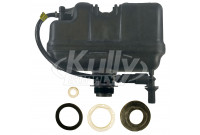
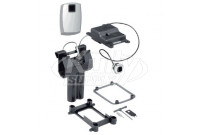
Flushmate 501-B Replacement Tank Kit
Model #: M-101526-F3B Item #: 162835Learn More- 1.6 GPF (Gallons Per Flush)
$223.68 -
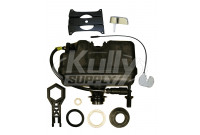
Flushmate 501-B Replacement Tank and Handle Kit
Model #: M-101526-F3BK Item #: 162831Learn More- 1.6 GPF (Gallons Per Flush)
- Includes Handle Kit
$235.57
-
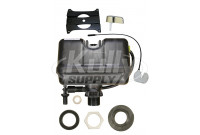
Flushmate 503 Replacement Tank and Handle Kit
Model #: M-101526-F31K Item #: 167050Learn More- 1.6 GPF (Gallons Per Flush)
- Fits Most 503 Two-Piece Toilets
- Includes Handle Kit
$234.72 -
Sloan Flushmate C-100500-K Replacement Cartridge Kit
Model #: C-100500-K Item #: 107428Learn More- Standard Flow Cartridge
$60.44 -
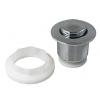
Sloan Flushmate BU-100505-K Upper Supply Kit
Model #: BU-100505-K Item #: 107429Learn More- Upper supply
- For all series
$16.07
-
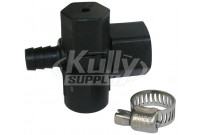
Sloan Flushmate BL100504-3-K Angled Inlet Supply Kit (Discontinued)
Model #: BL100504-3-K Item #: 107430Learn More- Lower supply
- For series: 503 and 504
- 90 Degree Inlet
-
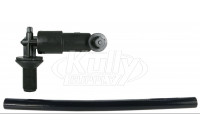
Sloan Flushmate BL100504-K Straight Inlet Supply Kit (Discontinued)
Model #: BL100504-K Item #: 107431Learn More- Lower supply
- For series: 501-A and 501-B
- Straight Inlet
-
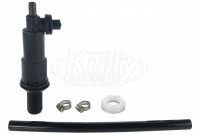
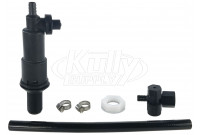
Sloan Flushmate RK100100 Straight Complete Supply Kit (Discontinued)
Model #: RK100100 Item #: 129643Learn More- Upper Supply
- 501-A and 501-B Series
- Straight Inlet Lower Supply
-
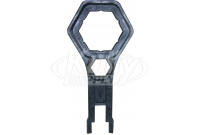
Sloan Flushmate ST100100 3-in-1 Wrench
Model #: ST100100 Item #: 129646Learn More- Cartridge Removal
- Water Supply Nut
- Tank Discharge Nut
$17.40 -
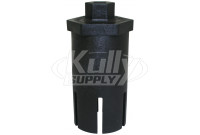
Sloan Flushmate ST100500 Cartridge Socket Wrench
Model #: ST100500 Item #: 129647Learn More- Cartridge Socket Wrench
$20.29 -
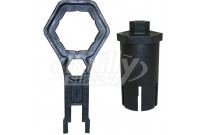
Sloan Flushmate ST100200 Tool Kit
Model #: ST100200 Item #: 152587Learn More- Handy 3-in-1 Wrench
- Cartridge Socket Wrench
$35.80
-
Sloan Flushmate B-108288 Duckbill Valve (Air Inducer)
Model #: B-108288 Item #: 129657Learn More- For all Flushmate models
$6.66 -
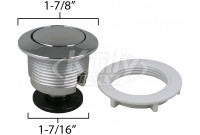
Sloan Flushmate DP500999-1 Push Button
Model #: DP500999-1 Item #: 129644Learn More- Chrome-plated plastic push button
- Convex
$43.50 -
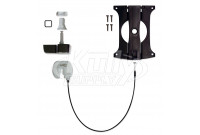
Sloan Flushmate AP300503 Handle Replacement Kit for 503 Series
Model #: AP300503 Item #: 162836Learn More- For all 503 Series
- 5 3/8” Mounting Bracket
List Price: $46.48 $44.75 You Save 4%
-
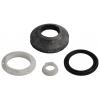
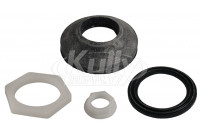
Sloan Flushmate BP200114-4 Small Discharge Gasket and Hardware Kit - 2-pc Toilet
Model #: BP200114-4 Item #: 163841 Learn More$36.76 -
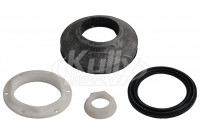
Sloan Flushmate BP200108-1 Large Discharge Gasket and Hardware Kit - 2-pc Toilet
Model #: BP200108-1 Item #: 164331Learn More- For all porcelain manufacturers EXCEPT American Standard
- For series: 503
$35.47 -
Sloan Flushmate K100500 Intelli-Flush Button Only
Model #: K-100500 Item #: 129652Learn More- Override button only (No sensor)
- Series: 501-B, 503, and 504
-
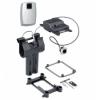
Sloan Flushmate K100100 Intelli-Flush Wall-Mount Sensor (with White Trim)
Model #: K-100100 Item #: 129648Learn More- White trim
- Wall Sensor with Override Button
- Series: 501-B, 503, and 504
-
Sloan Flushmate K100101 Intelli-Flush Wall-Mount Sensor (with Chrome Trim)
Model #: K-100101 Item #: 129649Learn More- Chrome Trim
- Wall Sensor with Override Button
- Series: 501-B, 503, and 504

